Booklet Making: How To Convert A Letter Size Document With Many Pages
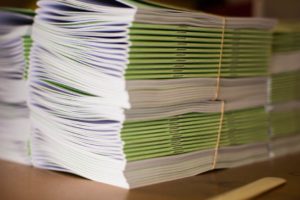
A booklet is defined as a saddle-stitched or coil bound print product, having at least 2 pages including a cover. We specialize in booklet making for customers all over Johnson and Wyandotte Counties in Kansas, plus Kansas City area businesses into western Missouri. If you have more than 50 pages, we suggested you coil bind it, or look into gluing it like a regular book or manual. You can choose a self-cover booklet, where the cover is the same paper as the inside pages, or pick a plus cover which has a little bit heavier card stock. There a slew of custom options when it comes to constructing an eye-catching booklet.
Call Moss Printing at 913-362-9292 for help in deciding the proper paper and cardstock for your project.
You need to decide on a size. Are you wanting something like a half-page end product? Take your individual page document and resize it to 5.5 x 8.5″ per panel. That way, when we print and fold it on a regular 8.5 x 11″ sheet, the final product looks like it does on your computer screen. The best way to design a booklet of this size is to actually type it in Microsoft Word or Adobe InDesign at the same 5.5 x 8.5″ size. If we have to resize you document from 8.5 x 11″ art to the new dimensions, either we stretch the proportions of your original art to fill the area or the type could be smaller than you want. We can also print larger sizes, and take your 8.5 x 11″ art to be printed as 11×17″ booklets, before folding and bindery.

Another issue from clients is staple and fold booklet making requires your art page number be in units of 4 (four). A front and back, folded piece of paper has 4 panels. Often clients will send us 26 (not 28) or 9 (not 8 or 12) pages of art to convert and print into booklet format. We have to add blank pages in such a situation. Most clients end up designing another few pages, or actually deleting a few to get a number divisible by 4. If you want coil or GBC binding, page units of 2 are fine. Odd numbers mean the last page on the back will be blank (or the inside back cover will be, if you want a printed back cover).

A final thought to contemplate is whether you want a bleed or not, especially on your cover, where the ink runs all the way to the edge of the paper. If you want a bleed, it costs extra for us to print your project on oversized sheets of paper. We then cut back the print to get the bleed. If you want a bleed, and your art is setup at a standard size or exact dimensions before the cut, expect the final product to be slightly smaller, after we trim it past the ink’s outer edge. All this extra effort costs more money in labor and paper. Many customers decide not to print a bleed if it saves them money.
I hope this information helps to answer some of your questions, if you are new to basic booklet design and printing.
